• Hey there Guest!
    If you enjoy BCF and find our forum a useful resource, if you appreciate not having ads pop up all over the place and you want to ensure we can stay online - Please consider supporting with an "optional" low-cost annual subscription.
    **Upgrade Now**
    (PS: Subscribers don't see this UGLY banner)
Tips
Tips

TR2/3/3A Rebuilding a cylinder head

CJD

Yoda
Country flag
Offline
Unfortunately the iron guide and iron head will expand the same. If you shoot a coolant through the guide hole, you could set up a gradient where the guide shrinks slightly before the cool is transferred into the head. That may work in removal. Cooling the new guid before insertion will definitely help with the install.

For height, put a valve you plan to use in the guide hole and install the spring retainer and keepers. Measure how much room you have between the spring retainer to the top of the head, and then subtract the lift you will be using from the cam and rockers. That is the highest you can install the guide. I usually shoot for about .1" extra clearance, just in case you ever get valve float, although that comes from my old high performance days. The TR engines are not that high performance to worry!?!
 

bobhustead

Senior Member
Gold
Country flag
Online
According to fairly reliable sources, including Boston University Physics Dept., a hole in iron will expand just as if it contained the surrounding material. I'll take my lickin and admit I'm wrong.
Bob
 
OP
S

sp53

Yoda
Country flag
Offline
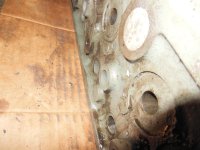
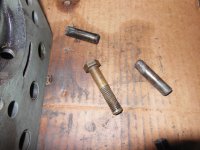
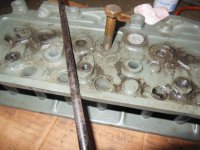
Removing the exhaust valves was not difficult. I used a brass bolt and drove them out with a few whacks. The brass bolt was nice because I used the head of the bolt at first then when the guide went below grade into the hole, I flipped the bolt over.

The paint the PO put on this head is something I believe called green death primmer by old body shops in the day. At first my plan was to drop the head in one of those white bucks half filled with gasoline and let that sit for a while and see if that would take it off, but now I might leave it on the head and glass bead the head where it needs to it. There are just a lot of carbon deposits in the intake ports.

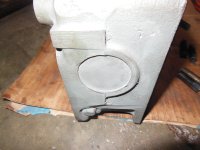
The plugs on the top of the head and end look newly replaced for the head, but difficult to say for sure, but they look good to me. In addition, the PO said he had the head magnafluxed( whatever that means) I guess that checks for crakes. I usually do not believe what I hear from a seller, but I like this guy. He was not a BSer.

Now I plan to buy some valves and guides from Moss. I have those other heads with springs plus I saved a lot of springs from other head work I have had done. I think the last time I spent 500.00+ so I am ok with learning.

Steve
 

Attachments

  • DSCN0010.JPG
    DSCN0010.JPG
    3.4 MB · Views: 10
  • DSCN0008.JPG
    DSCN0008.JPG
    3.3 MB · Views: 11
  • DSCN0007.JPG
    DSCN0007.JPG
    3.4 MB · Views: 10
  • DSCN0002.JPG
    DSCN0002.JPG
    3.3 MB · Views: 11
OP
S

sp53

Yoda
Country flag
Offline
Thanks Bob I can see it now; the hole would grow because the valve guide with a smaller different metal would stretch with the head because the metal is stuck that firmly. ( they might not think that, minds eye thing)My thoughts are the smaller metal of the valve guide would cool quicker and pull away from the larger casting because the casting cooled slower because its size retains the heat.

Bob I did not use heat on those valves guides because I forgot to; it was when I say this email I remembered to heat them. Just for clarity no heated needed only the brass 4 inch bolt, and wd40.

Steve
 

bobhustead

Senior Member
Gold
Country flag
Online
My earlier thought focused on forces sort of perpendicular to the circumference pushing the circumference "in". Boston University's simple explanation is that the circumference gets longer.
Bob
 
OP
S

sp53

Yoda
Country flag
Offline
Hi guys I am looking to see if anyone has an opinion on valve guide material to use in this tr3 head rebuild. I guess there is bronze or cast iron guides and I assume they can be mixed. I see the 3/8 and 5/16 size guides difference, but do not know about the different material. The bronze sounds better in the readings. I think I can get 3/8 cast iron valves guides for the exhaust valves from Rimmers bro. and that is what the head had in it.

Steve
 

Mikie808

Freshman Member
Country flag
Offline
I rebuilt my head during COVID from parts available on Rimmer Bros. I got a cheap OEM-sized valve set (from China?), and some OEM-style cast iron guides. They were not expensive. I had a shop press out the bronze alloy guides that had been installed by someone else because they were too hard and had scored the shafts of the valves I wanted to replace. I also had the shop tank clean and bead-blast the head to make it shiny again. Installing the new guides was easy with a hammer and a properly-sized installation tool that was less than 20 bucks online. It looked like a fancy nail-set. I used a spacer that I cut to get the heights right- they do not need to be perfect. I checked each guide with its valve for feel-fit and discovered that I needed to ball-hone a couple of them out, to loosen them up a bit. Then I hand-seated each valve in its new home with 2 grits of paste and one more pass with no paste. It performs great and the whole process cost only a couple-hundred bucks. These engines are not space ships- there seems to be a decent amount of room for home-mechanic variation (error!). Just my own experience- good luck!
 

TFB

Jedi Knight
Country flag
Offline
I admire the effort but you cant produce a good 3 angle valve seat without the proper equipment,
If you really want to do this yourself look at the New way cutters and guide pins.You can buy one cutter and guide pin,not a whole set,and the turn carbide cutters by hand.
If you got away with just valve grinding compound you must have had very good seats to start,And using a valve only address one angle,while putting a groove in the valve face.
Your stems were most likely scored from lack of clearance,not a to hard guide
And if a shop told me they used ball hones to size guides I would run away.
There's is no more room for the home mechanics variation than a shops.
Glad it worked for you ,but with labor the same , skimp on the machining is IMHO not recommended.
Tom
 
Last edited:

CJD

Yoda
Country flag
Offline
Hey Steve...

In a street engine, iron guides will work fine and last the longest. If you go to bronze, you have to open up the valve stem clearance at least .001 to .002", as they will tend to scuff the stems if you don't, and often stick if the clearance is as tight as the manual recommends with bronze. Iron guides can be tight enough that you need no other seals than the spring retainers to limit oil usage through the guides. If you go bronze, you will use a bit more oil, and it may even be a good idea to use special intake guide seals.

As you can tell, iron guides are simple and easy. Bronze guides take a bit more planning for clearance and seals...and are usually used on very high spring loaded valve trains instead of stock style engines.

If you replace the guides, it is mandatory to re-cut the valve seats. Any time the guide is replaced, the valve stem center is altered a few thousands in random direction's. If you try to change guides and then just put the valve back in, the valve will hit crooked every time it sets down. This will wear the new guide and make the seat oval...both not good things! With new guides, you must grind or cut the new seats to center concentrically with the guides.

Hope this explains why...?!?
 
OP
S

sp53

Yoda
Country flag
Offline
Thanks you guys for your help. Both you guys suggest the cast iron and they are cheaper than the bronze ones and sound better and easier to work with. I think I will go with the cast iron.

I like the idea of the 3/8 exhaust valve because it sounds stronger, but heck I do not know. All those collars deals I have are for the heads that have 3 exhaust valves.

Thanks John for that visualization. I see the difficulty clearer how the guide, valve, and the seat need to come together. Getting those 3 pieces to come together and seal up tight for compression and oil consumption does not sound easy. Anyways sounds difficult to accomplish a 100% proper rebuilding of a head without some special equipment.

I wonder what a diy guy could do to get a homemade valve job if the seats and guides where left in place. I was going to do exactly what Mike did.

We did do valve jobs in high school or I should say we removed the heads from some teachers cars and a few handpicked kids would finish them.

I have put about 10K on tr3 in the last 15years and I am 70 so there is also that to consider.

I remember people saying the guides need to be replaced because the lead was taken out of the fuel and engine burned hotter and needed a different harder valve seat to deal with the heat , but was not sure how important that all was. But I always paid for it at the machine shop.

steve
 
Similar threads
Thread starter Title Forum Replies Date
I TR6 TR6 cylinder head rebuilding advice Triumph 15
Lin Rebuilding a master cylinder for BT7 Austin Healey 3
P Rebuilding Brake Master Cylinder an Impossibility? MG 5
J Master Cylinder Rebuilding Question Spridgets 3
S TR2/3/3A Rebuilding a tr3 transmission and second gear, Triumph 57
S TR2/3/3A when rebuilding a differential Triumph 9
M TR2/3/3A Rebuilding suspension Triumph 29
G Rebuilding Front Seats Austin Healey 4
E TR6 Rebuilding Distributor Triumph 2
JMACENGINESHOP BJ7 Engine Rebuilding Austin Healey 23
S TR2/3/3A Engine Rebuilding. Triumph 14
L MGB Rebuilding a 1977 MGB MG 1
S TR2/3/3A Rebuilding the early tr3 starter Triumph 5
Joel Lester TR2/3/3A What type of valve to use when rebuilding the head? Triumph 10
KVH General Tech Rebuilding the Engine Triumph 5
K TR2/3/3A Rebuilding an Engine?..New Cam Sprocket & Gear...1/2 Price Triumph 0
drooartz Rebuilding rear axle Spridgets 19
T Rebuilding a 1275 for a BE Spridgets 8
pkmh Rebuilding Armstrong Lever Shocks on a BJ8 Austin Healey 28
steveg Steering rocker shaft - chemical rebuilding Austin Healey 3
steveg Rebuilding roadster windshield Austin Healey 24
A Rebuilding Tiger window regulator question Sunbeam (Rootes) 3
S TR2/3/3A Rebuilding Dr2 Lucas wiper motor Triumph 16
S TR2/3/3A rebuilding bomb nose starter Triumph 9
W Looking for engine rebuilding 100-6 Austin Healey 12
KVH General Tech Rebuilding the Engine--a few practice pointers [for me] Triumph 11
R TR2/3/3A Rebuilding H4 carbs Triumph 8
S TR2/3/3A rebuilding door panels Triumph 15
Rut TR4/4A Seat rebuilding Triumph 3
steveg Rebuilding the Dip Switch Austin Healey 9
Tinkerman TR2/3/3A Rebuilding SU carbs 1960 TR3A Triumph 3
Rut TR4/4A Seat rebuilding Triumph 6
CZ_Dave MGB Is it worth doing the Shock Conversion Kit or Rebuilding Exsisting shocks? MG 16
JFeher TR2/3/3A Rebuilding A type OD I Need advise / measurements Triumph 14
KVH TR4/4A Engine rebuilding Triumph 17
gbtr6 TR6 Rebuilding TR6 Engine, Tips? Triumph 7
pbraun Anyone have a 1275 core for rebuilding? Spridgets 8
Got_All_4 TR2/3/3A Continually Rebuilding of my J Type Gear Box Triumph 2
drooartz MGB-GT Rebuilding the seats MG 28
Gray_Cat MGB Rebuilding MGB Overdrive MG 4
S TR2/3/3A rebuilding a tr3 water pump Triumph 22
PatGalvin TR2/3/3A Guide for SU Rebuilding Triumph 8
H TR4/4A 4A convertible top rebuilding sequence Triumph 8
sim Rebuilding Front Suspension 58 sprite spring question Spridgets 6
Lukens TR2/3/3A More questions about rebuilding my steering box Triumph 20
charleyf TR4/4A Hs6 carb rebuilding Triumph 8
S TR2/3/3A Transmission Rebuilding Triumph 29
L 1966 BJ8 frame rebuilding questions Austin Healey 1
djackson Rebuilding 100/6 Transmission Austin Healey 6
bighealeysource Rebuilding BN2 generator Austin Healey 5

Similar threads

Top