• Hey Guest!
    BCF is a resource offered at no cost to the Little British Car community. We do not require you to pay to play here. However, if you find BCF helpful, appreciate no pop up ads, and you want to ensure we stay online - Please support us with an "optional" low-cost (less than many car club dues) member upgrade. There are some benefits to upgrading!
    **Upgrade Now**
    (PS: Subscribers don't see this UGLY banner)
Tips
Tips

A-type overdrive / gearbox trouble shooting

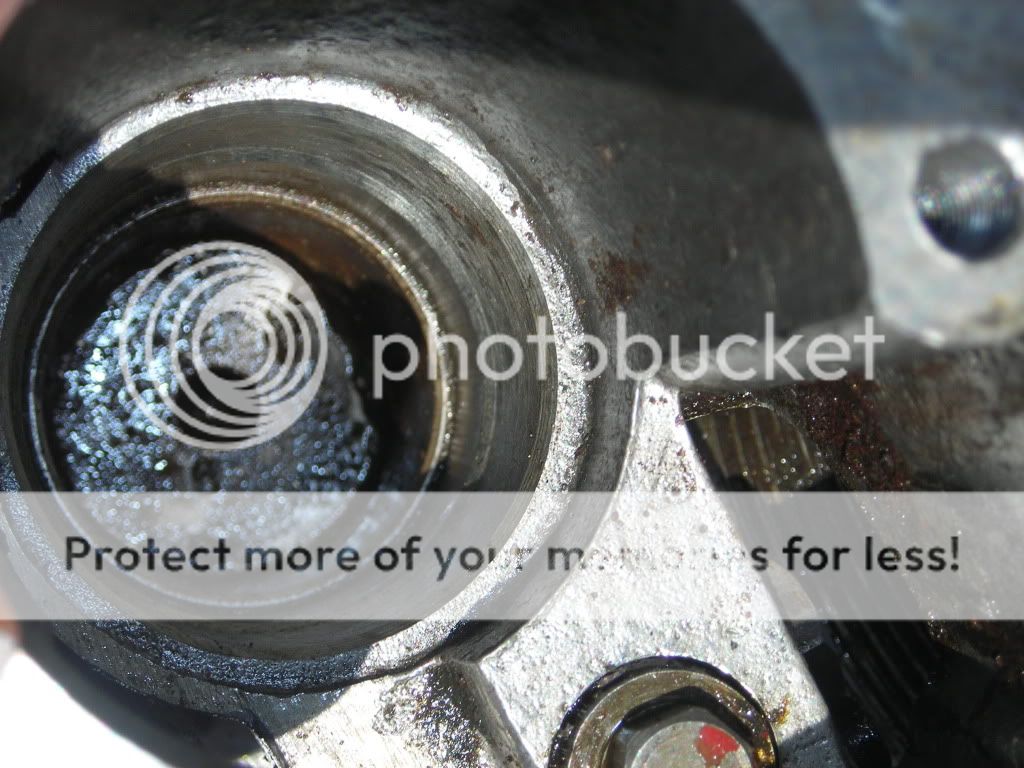
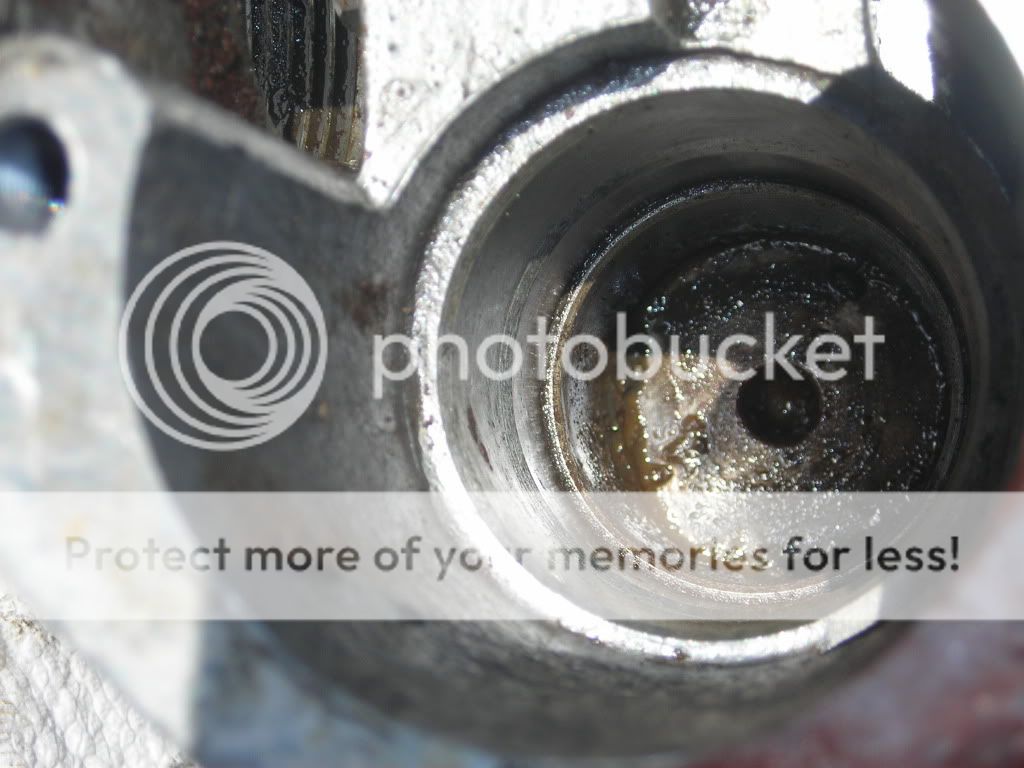
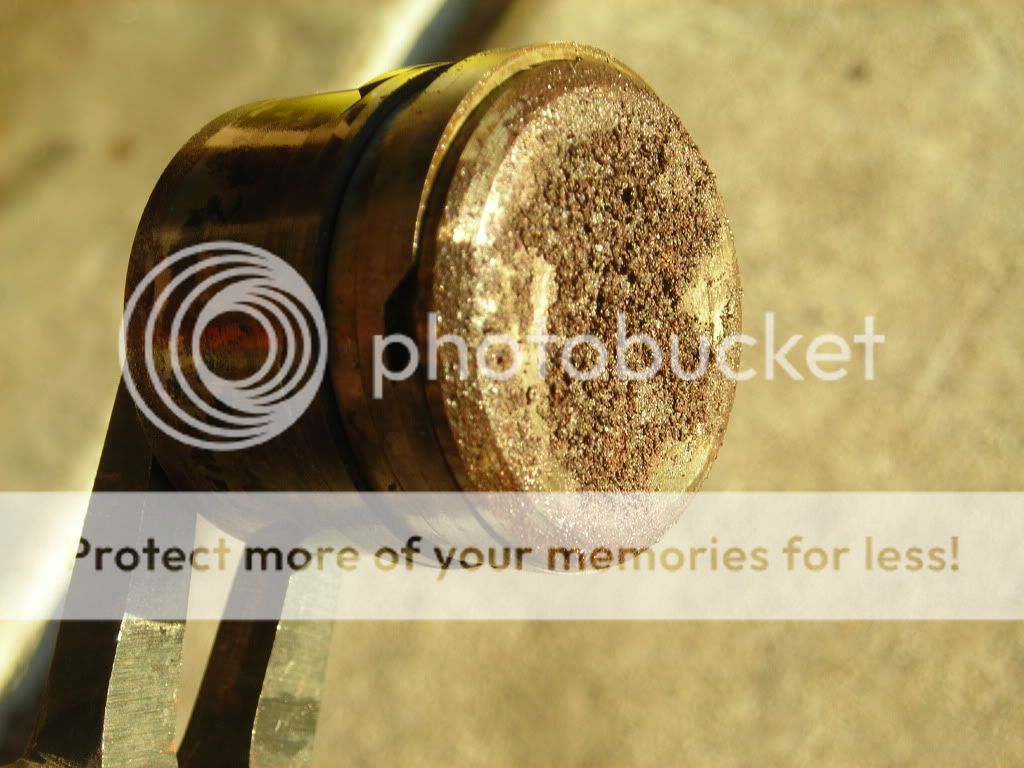
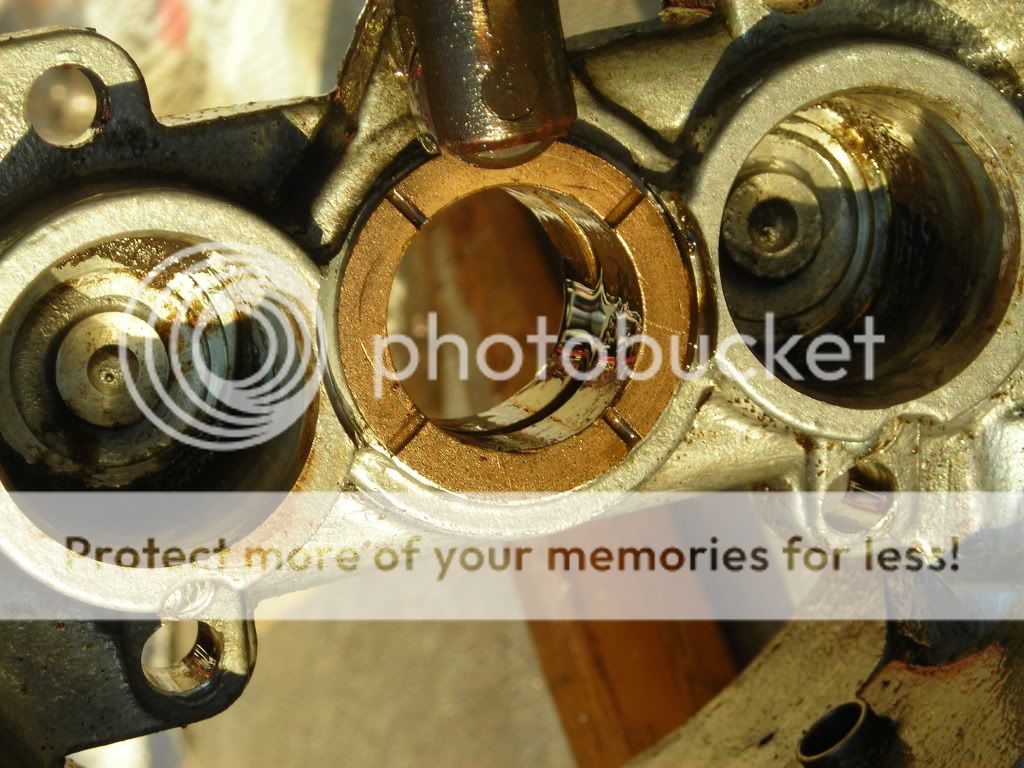
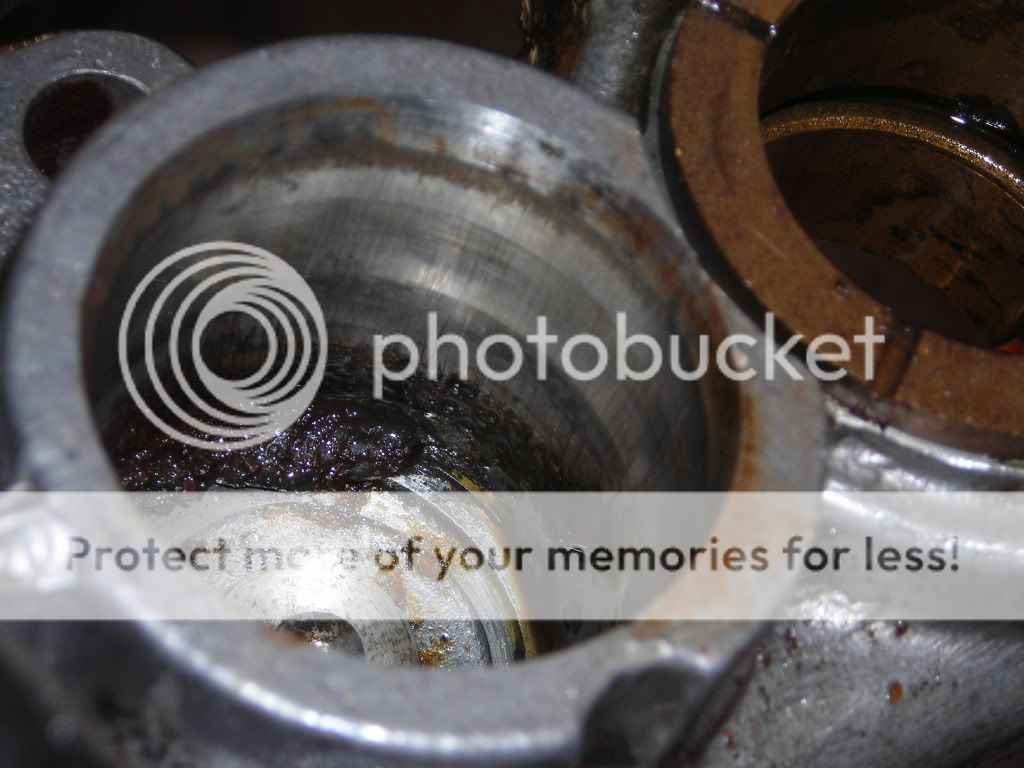
Here is what the accumulator bore looks like now;

10-24-09yetmorema-type1.jpg


10-24-09yetmorema-type.jpg


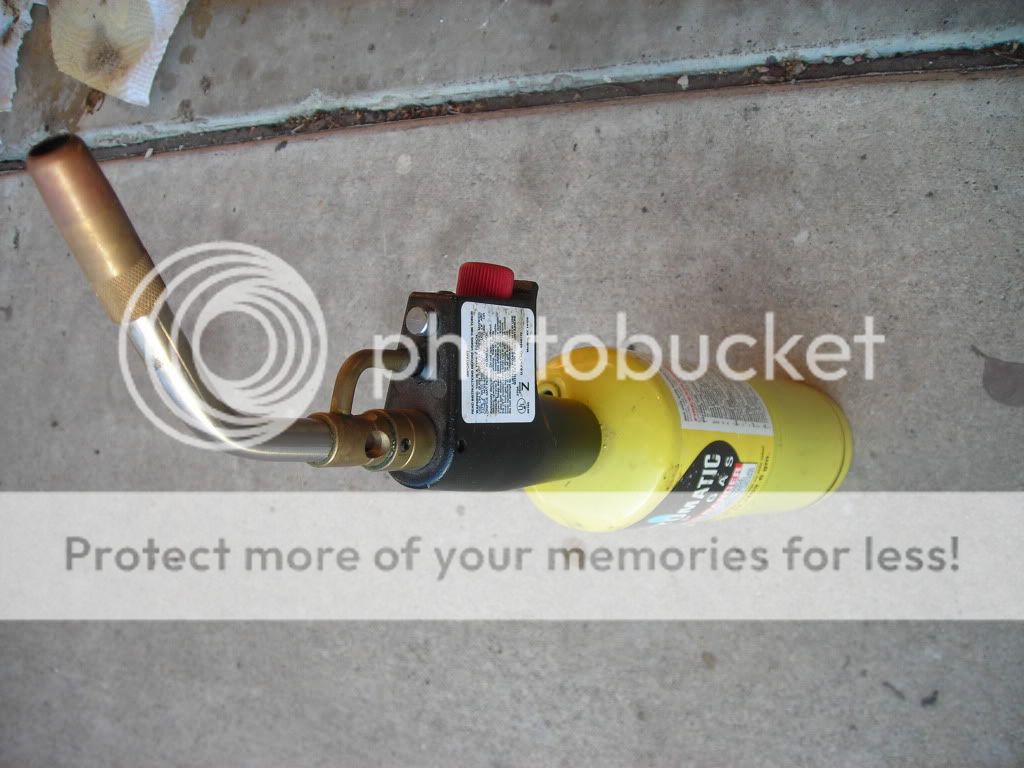
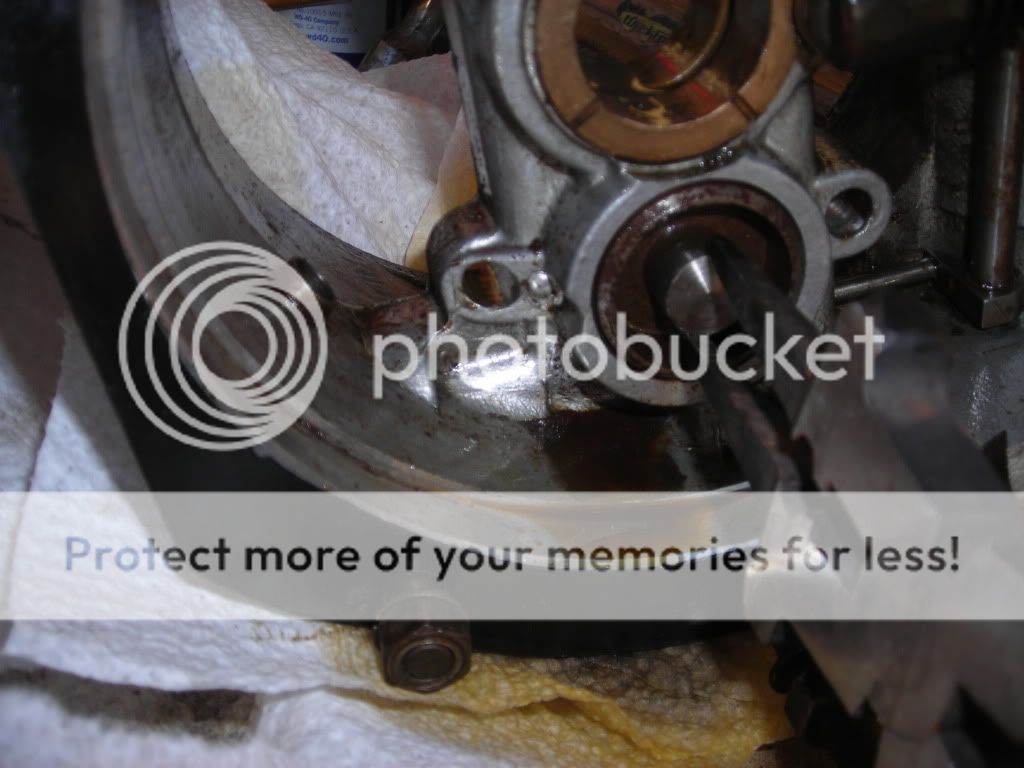
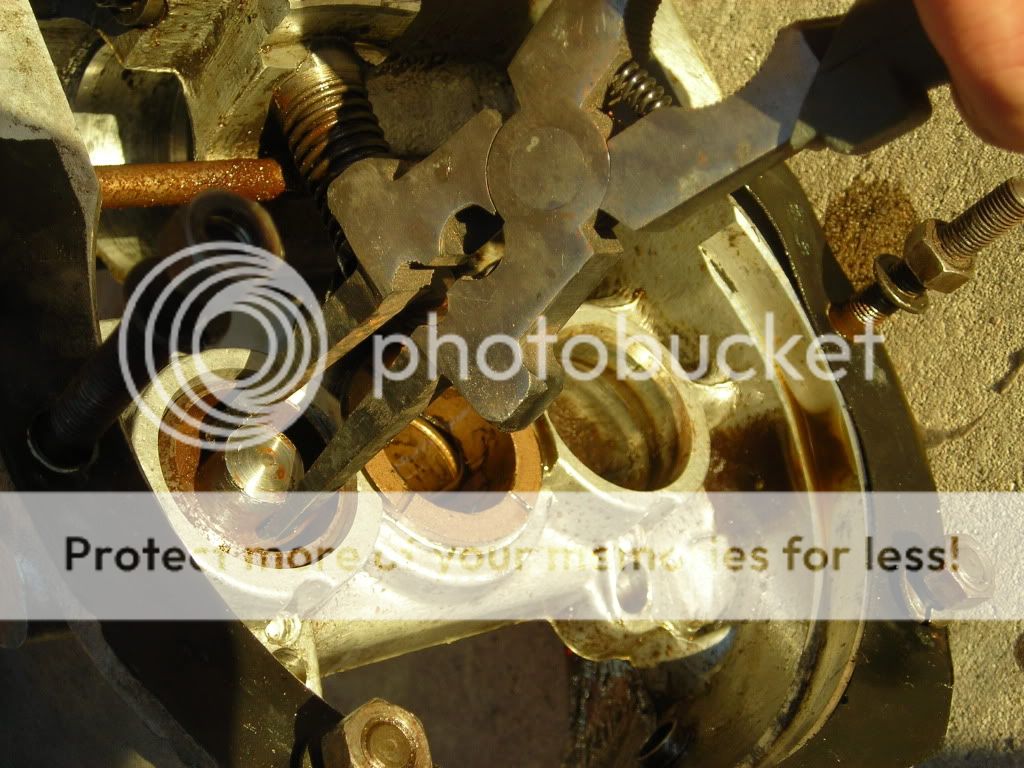
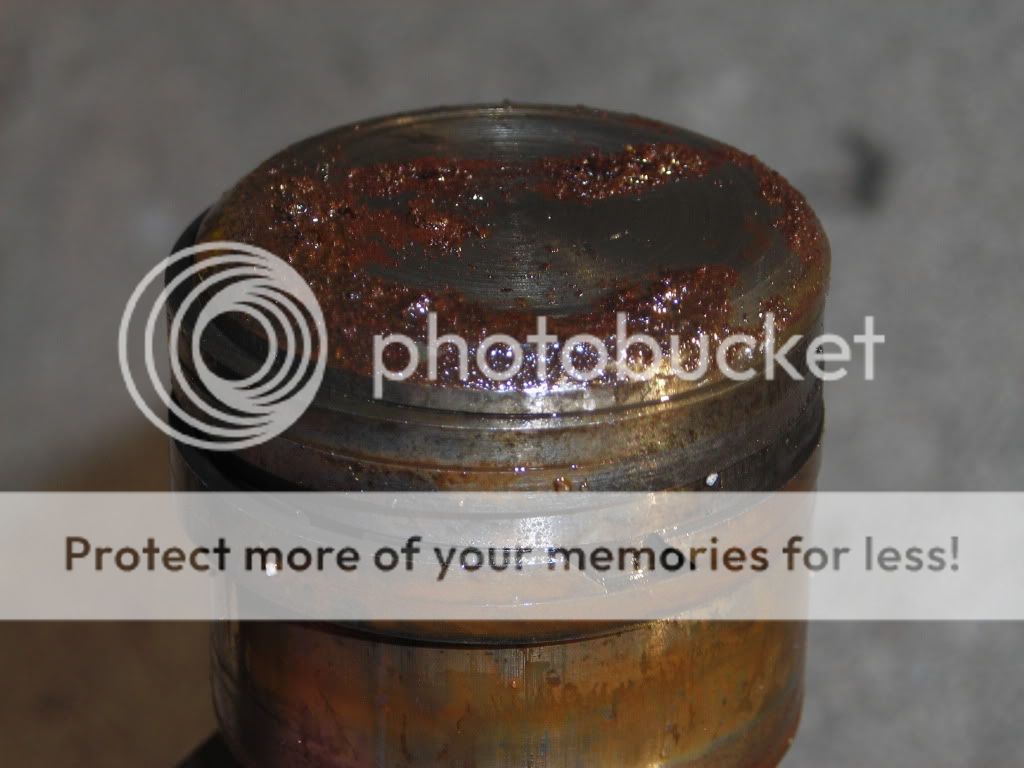
I hit the area surrounding the operating pistons with heat from a propane touch from the rear (so not the piston but rear of the housing they go into) and then with more Freeze-off from the front. There is a rusty clear liquid that runs of of the piston area when I do that, so hopefully that and more PB will help loosen then up. I didn't want to use too much heat since I believe there are O-rings in there that probably won't like getting too hot.
 
Thanks - I'm going to try heat/PB several more times. I'll grab a 7/16 fine thread rod referenced in the Buckeye write-ups to try and get the oil pump piston loose as well.
 
tdskip said:
I didn't want to use too much heat since I believe there are O-rings in there that probably won't like getting too hot.
If they are rubber O-rings, you're going to replace them anyway!

But I'm pretty sure your unit is early enough to have the steel piston rings. The change to O-rings didn't happen until during TR4 production, and that looks like a 3-synchro (ie TR3) box to me.

And aluminum expands much faster with heat than steel does, so it doesn't really matter if the pistons get hot as well. Heating the whole mess will still increase the clearance between pistons & cylinders.

Sorry, mine have always come out without too much struggle, so I don't have any other suggestions, except maybe putting some air pressure on them and then rapping on the pistons with a brass hammer.

Another thing that might work : connect a big slide hammer to a pair of vice grips.
 
OK - made some progress here.

I used this to heat up the piston housing;

10-24-09pistonremovalsuccess12.jpg


Followed by immediate application of Freeze-Off;

41WzXNWe2sL._SL500_AA280_.jpg


And several cycles of that got the bottom piston turning;

10-24-09pistonremovalsuccess1.jpg


And then pulled out. And sure enough, just as Randall indicated, it has metal rings on it;

10-24-09pistonremovalsuccess4.jpg


The top one was still completely stuck;

10-24-09pistonremovalsuccess6.jpg


So more heat, more Freeze-off, more heat, more Freeze-off and then it started to turn and then came out;

10-24-09pistonremovalsuccess7.jpg


Here are the bores;

10-24-09pistonremovalsuccess10.jpg


Close up of the left bore;

10-24-09pistonremovalsuccess8.jpg


And the right bore;

10-24-09pistonremovalsuccess9.jpg


And pistons after being wiped off with a rag;

10-24-09pistonremovalsuccess11.jpg
 
TR3driver said:
But I'm pretty sure your unit is early enough to have the steel piston rings. The change to O-rings didn't happen until during TR4 production, and that looks like a 3-synchro (ie TR3) box to me.

How do you know all this stuff?!?!? Dead on, again. As usual...

TR3driver said:
And aluminum expands much faster with heat than steel does, so it doesn't really matter if the pistons get hot as well. Heating the whole mess will still increase the clearance between pistons & cylinders.

This has been my approach with anything that has put up a fight, and I am convinced it is the ticket to removing stubborn parts in the O/D. Hope this, and the rest of the thread, help some other BCF folks.

Oh, and I goofed in my earlier post. The accumulator bolt size is 3/8 not the 7/16 I mentioned earlier - sorry for the error.

Next up is to make a puller for the accumulator piston.

10-24-09yetmorema-type.jpg
 
I don't know how you camera buffs do this... This is probably more pictures -- just of this overdrive project -- than I took in 3-1/2 years of taking my car all apart and putting it all back together. Amazing...
 
Great learning forum for us all, keep up with all the pictures. Also how do you keep your hands so clean?
 
<div class="ubbcode-block"><div class="ubbcode-header">Quote:] Amazing...[/QUOTE]

Yes, it's a bit like a Socratic dialogue: yes, Socrates, no Socrates, now I see Socrates . . .

Amazing. And illuminating. A guided tour of misty innards.
 
tdskip said:
How do you know all this stuff?!?!?
Hmm, well, must've been about 1975 when I bought an entire TR4 just to get it's OD; learned about it much the same way you are, except I didn't have the Internet or even so much as a parts diagram for it.

BTW, I have a PDF file of the A-type service manual. If anyone wants a copy, PM me your email addy.
 
Randall, your box is full, must be a big demand.
tdskip, my top hat is off to you and your current project. I must admit I bought my OD already rebuilt and am glad after finally getting the gearbox back together after being out of town all summer.
Question: Am I correct the the cam goes on the shaft directly behind the center bearing circlip and has no spacers/washers there or between it and the bushing in the od?
 

Attachments

  • 18881.jpg
    18881.jpg
    63.2 KB · Views: 540
sail said:
Randall, your box is full, must be a big demand.
Sorry about that, should be better now.
<div class="ubbcode-block"><div class="ubbcode-header">Quote:]
Question: Am I correct the the cam goes on the shaft directly behind the center bearing circlip and has no spacers/washers there or between it and the bushing in the od? [/QUOTE]That's the way I remember it.

Remember, these were "general purpose" overdrives, not specific to the TR gearbox (except for mainshaft & adapter plate) ... my guess is that the face of that bushing was used in other applications.
 
TR3driver said:
Remember, these were "general purpose" overdrives, not specific to the TR gearbox (except for mainshaft & adapter plate) ... my guess is that the face of that bushing was used in other applications.

I can confirm that the J-type for Volvo's looks identical, in fact there is a local Volvo O/D guru down here who is going to try mounting my A-type to one of his test gearboxes set-ups so we test it in a running setting (on the bench). I'll, of course, let you know how that goes.
 
Hi guys - quick a quick update. I've had some success - with help from the guys over on the Spridget forum - using an electrolytic rust removal process on some Bugeye parts.

I'm debating using this on the annulus - any reason not to?

DSCN3729.jpg


Here is a fun video (not mine) on the process;

https://www.youtube.com/watch?v=R5I5WBG5HPw

Thanks!
 
Haven't tried it myself yet, but that looks to be the process I was suggesting before. My Dad claims it works well at removing the rust with minimal damage to the non-rusty metal (but of course doesn't replace the metal that changed to rust).

I'd go ahead and pull that bearing first, though. It should be replaced, even if you can get it to feel smooth again.
 
tdskip said:
[a local Volvo O/D guru down here who is going to try mounting my A-type to one of his test gearboxes set-ups so we test it in a running setting (on the bench). I'll, of course, let you know how that goes.

I bench tested my O/D (when I was fixing it) without mating it to the gear box. What I did was buy a bunch of corks of various sizes so that I could seal off the holes in the adapter plate. Then I drove the output of the O/D with a 1/3 HP electric motor driving a pulley I bolted to the output coupler on the O/D unit. Worked great.

Once I did mate the two parts I tested the combined unit the same way on the bench.

I have pictures but I am on the road and don't have access to them. If you want to see them send me a PM.
 
So after a full day of "cooking";

Here is the scum that same off;

DSCN3820.jpg


And here is the annulus,

DSCN3821.jpg


The red stuff you see remaining here wipes off easily.

DSCN3822.jpg


The bearing even turns a little bit now after being completely stuck in place.
 
Cool.

Cheers,

M. Pied Lourd
 
Just curious, why didn't you pull the bearing first? There's bound to be more gunk under/behind it.
 
Similar threads
Thread starter Title Forum Replies Date
Got_All_4 TR6 Refurbishing gearbox with A type overdrive Triumph 7
T A-type Overdrive & Gearbox Triumph 9
71TR6 TR6 Type-J Overdrive identification Triumph 4
T TR2/3/3A A type overdrive hard engagement Triumph 36
R TR6 J-Type overdrive will not disengage when warm Triumph 8
RonC TR2/3/3A J Type Overdrive in TR3A Triumph 4
H TR4/4A A-type overdrive pump Triumph 4
D TR2/3/3A Type A overdrive not engaging Triumph 0
D TR2/3/3A Type A overdrive not engaging Triumph 16
M TR4/4A A type Overdrive Oil Leak Fix Triumph 3
Graham H TR2/3/3A A type overdrive Triumph 6
KVH General TR Type A Laycock Overdrive Questions Triumph 8
C TR2/3/3A A-type overdrive drain plug oring Triumph 1
J TR4/4A TR4 A Type Overdrive Part mixup Triumph 4
CJD TR2/3/3A A type Overdrive Seal Triumph 9
T Spitfire J Type overdrive Triumph 2
T TR2/3/3A Question on A-type overdrive solenoid Triumph 21
BillyB62 TR2/3/3A Type A TR3 Overdrive Wiring Triumph 13
T TR2/3/3A Question on A type overdrive spec for "clutch movement from direct to overdrive" Triumph 7
M_Pied_Lourd TR6 J Type Overdrive High Pressure Filter Cap-Major Problem Triumph 6
R A Type Overdrive reassembly question Austin Healey 3
R TR2/3/3A A-Type overdrive question Triumph 8
T TR2/3/3A My A-Type overdrive rebuild project, some questions Triumph 36
T TR2/3/3A Will Spitfire D-type overdrive work in TR3 with TR4 transmission? Triumph 3
R Overdrive [Type A] brake ring gaskets Austin Healey 1
R TR2/3/3A Overdrive [Type A] Brake Ring Gaskets Triumph 14
J General TR D Type overdrive not working need suggestions Triumph 5
Gordon_Dedrick TR2/3/3A A type overdrive installation Triumph 7
T TR2/3/3A Type A Overdrive, Physical Differences between Roadster Brands? Triumph 2
T TR2/3/3A Type-A Overdrive Handling Differences Triumph 9
A TR5/TR250 A-type overdrive questions Triumph 25
71tr TR6 Overdrive Mount / J-type on A-type frame Triumph 1
D TR6 76 TR6 J Type Overdrive Triumph 7
Gordon_Dedrick Testing an A type overdrive Triumph 20
Simmo I need help with J Type Overdrive Triumph 15
Q "A" Type Overdrive Annulus End Float!! Triumph 4
D A type overdrive question. Triumph 3
John_Mc J-Type overdrive for sale on CL Triumph 4
KVH More on A Type The Overdrive Triumph 2
Coyote1 J Type Overdrive engage problem Triumph 3
J A Type Overdrive Triumph 17
K TR6 TR6 J Type Overdrive...Link to Schematic? Triumph 3
O J Type Overdrive Conversion Triumph 19
Marvin Gruber J type overdrive unit on BCF classifieds Triumph 2
HerronScott TR4/4A TR4A A-type overdrive and Moss Europe TR2-4A cat. Triumph 2
TR3TR6 J-type overdrive question Triumph 5
CinneaghTR A-type Overdrive Model Number Triumph 14
71tr J-type Overdrive Pressure Port Question Triumph 2
R_Lyle TR6 J-Type or A-Type Overdrive for 1972 TR6 Triumph 18
TR4A_IRS Looking for a J Type Overdrive? Triumph 0

Similar threads

Back
Top