• Hey there Guest!
    If you enjoy BCF and find our forum a useful resource, if you appreciate not having ads pop up all over the place and you want to ensure we can stay online - Please consider supporting with an "optional" low-cost annual subscription.
    **Upgrade Now**
    (PS: Subscribers don't see this UGLY banner)
Tips
Tips

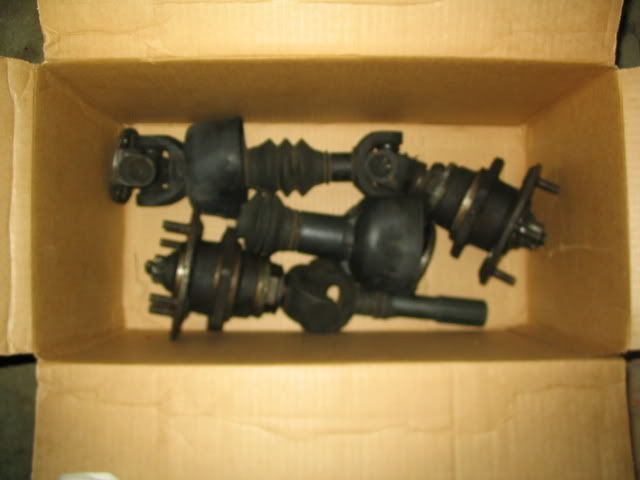
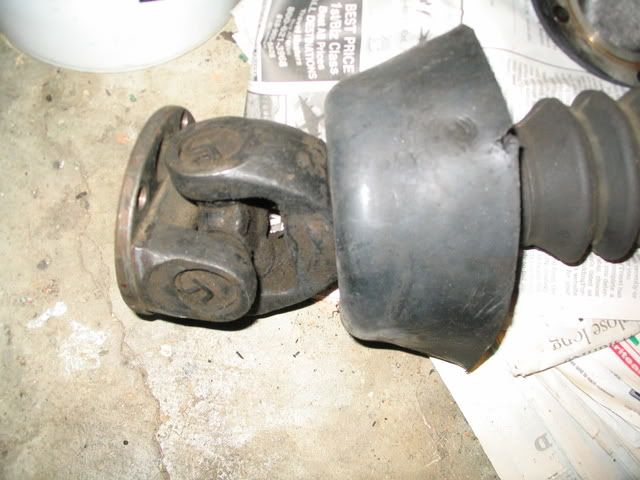
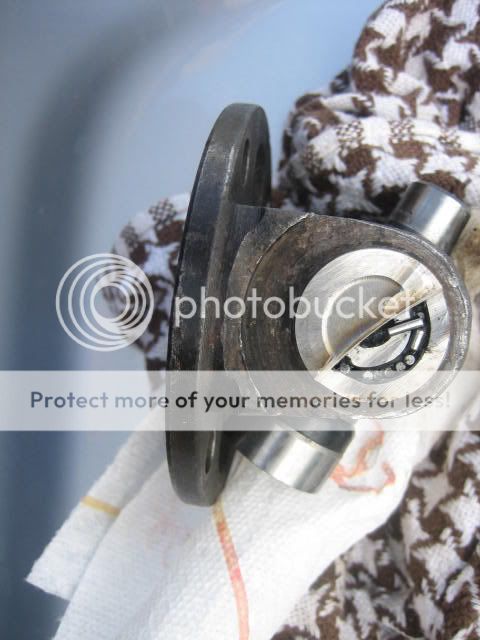
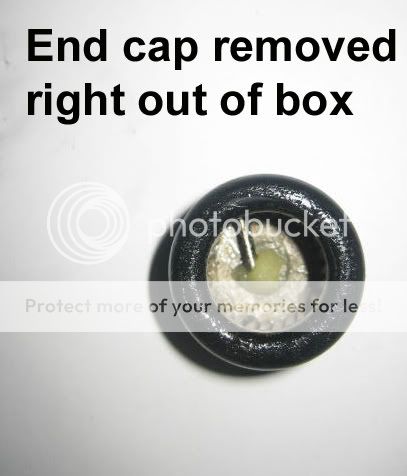
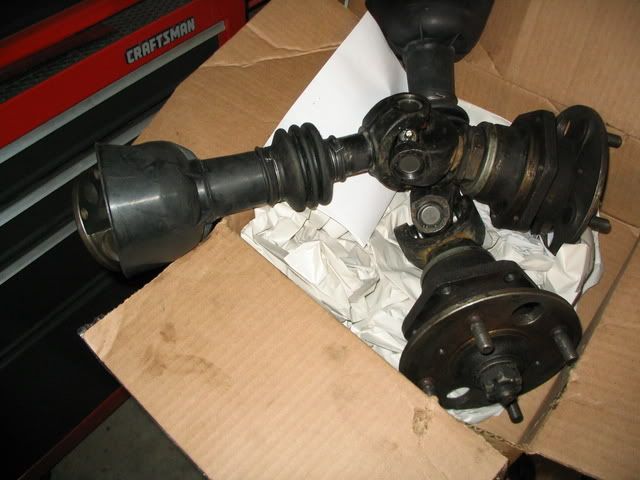
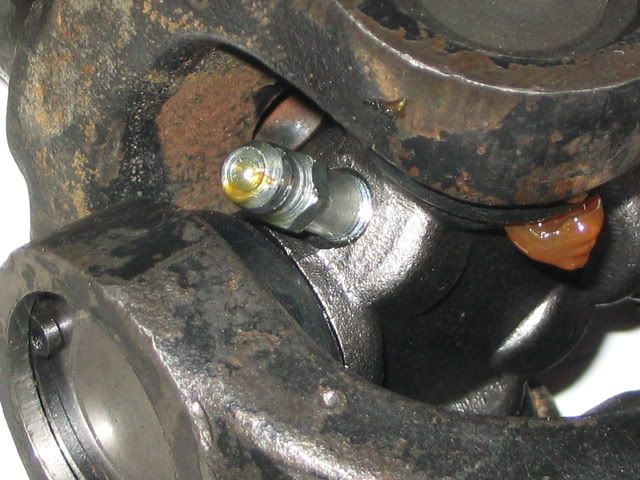
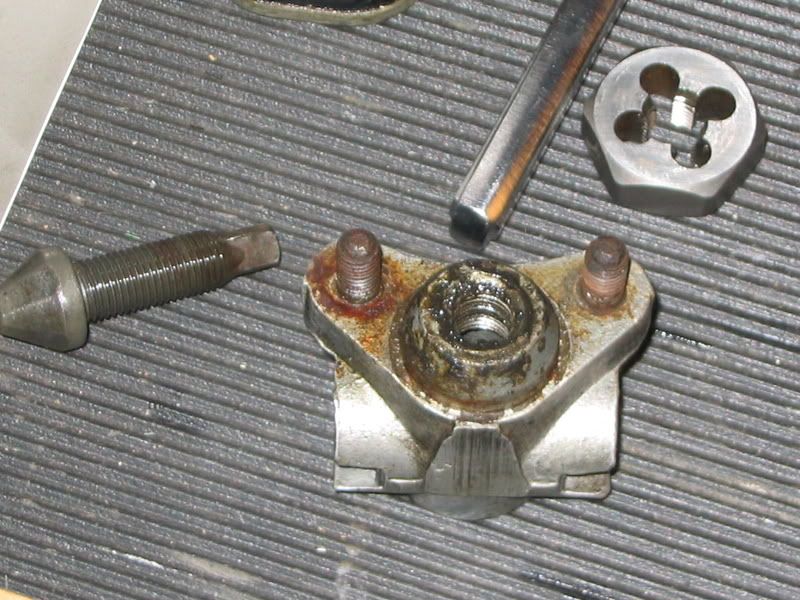
TR6 TR6 half-shaft removal

mrv8q

Luke Skywalker
Country flag
Offline
Is it as easy as the Bentley manual makes it out? I've removed the 6 Nylocs from the studs on the brake side, and will tackle the diff/u-joint side tomorrow... anything else I need to know to pull out the half-shafts?
 

RobT

Jedi Warrior
Offline
Nope. It really is that easy. The whole thing just feeds through the swing arm. Reinstalling you need to be carefull not to over-torque the 6 studs that go into the aluminium swing arm. These are fine threads and will strip easily if not carefull.

Rob.
 

Brosky

Great Pumpkin
Offline
Only that if you're rebuilding one side, bite the bullet and do the other as well.

Kodanja will attest to that.
 

poolboy

Yoda
Country flag
Offline
Removing the nuts and bolts (4) from the flange may get tiresome. Or it could have been my technique or tools. I found that I had to rotate the Axle each time I wanted to loosen a particular nut in order to find the spot where a box end wrench would fit due to the U-joint itself and with that spot found, I was able to make half circle turns of the wrenches, at most.
Are you looking to replace U-joints or the hub bearings?
 
OP
mrv8q

mrv8q

Luke Skywalker
Country flag
Offline
poolboy said:
Are you looking to replace U-joints or the hub bearings?
Right now, the U-joints on both sides, but as Ed Hart used to say on the old FNN, "We shall know more in the fullness of time"...
 

kodanja

Obi Wan
Country flag
Offline
do both sides at the same time *YOU WONT REGRET IT!!!

3500+- miles breakdown free and counting!!! :banana: :driving:
 
OP
mrv8q

mrv8q

Luke Skywalker
Country flag
Offline
Thanks, fellas for the advice. As Rob says, it really is that easy. However, as Poolboy says, it really is drudgery up there, half a turn at a time. My best bet, after loosening the nylocs, was to use a 1/4 socket wrench, w/ a 9/16 socket.... still took a while. Here's the result:
IMG_0818.jpg


Funny enough, the hardest part was to get the inner u-joint with the round rubber boot combination out the hole, On the second one, I used some Cable-Glide, which is a slick water-based lubricant for running video cable in tight spaces and long runs. Seemed to help a little bit, but still not easy. On reassembly, I think I'll flip the rubber boot like so, to ease re-entry:

IMG_0817.jpg


Next up, I'll order the 4 boots, and try and find a shop that'll do the u-joints for me: I'm not up for that job!

On a related note, is it possible to remove the diff w/o removing the exhaust? I'm running a solid Monza, all welded, and I'd love to do the driveshaft u-joints as well. I can see how, <span style="font-style: italic">in theory</span>, the diff can ease out w/ a dolly jack, but perhaps some one has already thought of that....
 

Aeroken

Senior Member
Offline
I just reinstalled my axle shafts this afternoon. Flipping the boot over like you showed worked like a charm. My boots were new and very flexible so that may have helped, but they still slid back through very easily with no lubricant or tie wraps needed. I just slid the flange in then pushed the boot into the hole and through it went. It might have helped that the hole was very clean because I had the TA's media blasted while they were off.

Attaching (or removing) the flange bolts is a whole lot easier with a 24" extension bar (or a couple of 10 inchers will do) through to the outside and a box end wrench on the inside. I was able to sit outside the wheel well and reach through to do the whole thing. This even let me put the torque wrench on to cinch them down nicely. Took less than 15 minutes a side including going around an extra time with the torque wrench to make sure I didn't miss one.

Removing the diff with the exhaust in place would be very difficult if not impossible with the stock exhaust in place, but I'm not familiar enough with the Monza.

Ken
 

poolboy

Yoda
Country flag
Offline
I should have mentioned the tight squeeze with the boots. When I saw that it was going to be that tight, I separated the axle at the splines (looks like you did too) and lowered the inboard half down instead of trying to pull it thru the T/A. I put it back together the same way. Putting the inboard half in place first,then sliding the outboard half thru the T/A to mate with it, followed by re clamping the spline joint boot.
I don't blame you one bit for not fooling with the U- joints yourself. I beat on mine for a half hour before I gave up and found a shop to do it.
 
T

Tinster

Guest
Guest
Offline
poolboy said:
I don't blame you one bit for not fooling with the U- joints yourself. I beat on mine for a half hour before I gave up and found a shop to do it.


<span style="color: #990000">But remember, even professional shops
can screw up u-joints. Make sure your shop completely
cleans out the factory packing grease and istalls proper
grease. The needle bearings easily slip out of position
and can end up under the cap and really bugger things up. </span>

needle.jpg


hsujoint2.jpg
 
OP
mrv8q

mrv8q

Luke Skywalker
Country flag
Offline
Got my half-shafts back from the drive-line shop today; everything looks good!

IMG_0833.jpg


They installed the long grease nipples that came with the Hardy Spicer u-joints, but I think they look odd; there were counter-sunk screws in there before..... I guess they won't foul anything:

IMG_0835.jpg


Hopefully, I'll be installing these next weekend... got some more cleanup to do beforehand...
 
OP
mrv8q

mrv8q

Luke Skywalker
Country flag
Offline
Don, I was lucky enough to find a place about 10 minutes drive from work, https://driveshaftsonly.com/ (NFI) I told them I was in no rush, dropped 'em off Friday at lunch, they were ready Tuesday morning. I supplied boots, gaiters, and 4 Hardy Spicer u-joints. Reassembled, $70; worth it, in my opinion.... The owner said, "I remember those"....
 
OP
mrv8q

mrv8q

Luke Skywalker
Country flag
Offline
I thought I'd post a quick update on this job: this is not a difficult task at all. I found replacing the brake shoes on the backing plate the hardest part of the sequence. The Benteley doesn't say to remove the brake shoes, but I found it much easier to put the half-shafts back in w/o the brakes in the way. I also found a good shop to do the u-joint installation, otherwise I might still be at it:

IMG_0842.jpg


It gave me a chance to clean the backing plates themselves, and also allowed me to clean up the rear brake adjusters:

IMG_0844.jpg


They were groady to the max; one was completely frozen. Happily, a little PB Blaster, some tap and die work, and I've got some decent rear brakes..... the handbrake also works great.
In reading other posts, I think I was lucky that I had no trailing arms stud issues. One stud on each side was buggered up, but luckily only on the outside threads; the TA sides were great. The lists was helpful in that you advised caution on snugging in those studs, whereas I'd probably tighten them as hard as I could, with the consequence of stripping them out.
So, for the first time in about 5 months, I have all four tires on the ground; no jackstands. My tall "4X4" TR6 has assumed it's intended proportions with terra firma. I think a carburettor overhaul is next, and I can commence with a little driving, and turn my attention to cosmetic interior/exterior details. Hopefully, I'll have a decent driver to join the TR3 by September....
 
T

Tinster

Guest
Guest
Offline
mrv8q said:
Don, I was lucky enough to find a place about 10 minutes drive from work, https://driveshaftsonly.com/ (NFI) I told them I was in no rush, dropped 'em off Friday at lunch, they were ready Tuesday morning. I supplied boots, gaiters, and 4 Hardy Spicer u-joints. Reassembled, $70; worth it, in my opinion.... The owner said, "I remember those"....

<span style="color: #CC0000">Wow!!

Fantastic price, Kevin!!

I paid $450 here on the island
for the same labor.

d </span>
 

Andrew Mace

Moderator
Staff member
Country flag
Offline
mrv8q said:
Got my half-shafts back from the drive-line shop today; everything looks good!...They installed the long grease nipples that came with the Hardy Spicer u-joints, but I think they look odd; there were counter-sunk screws in there before.....
Personally, I like to leave the counter-sunk screws in there and, as needed, replace them with the long grease nipples ONLY to offer up lubrication...and then put the screws back in. But there might be no harm in leaving the grease nipples in place?
 
Similar threads
Thread starter Title Forum Replies Date
hondo402000 TR6 TR6 dropped the Diff out and half shaft question Triumph 2
J TR6 TR6 - half top/bikini top? Triumph 1
Hawk813 TR6 TR6 Brakes Triumph 2
M For Sale 1971 Triumph Tr6 Triumph Classifieds 0
J For Sale Set of Dayton 72 spoke chrome wire wheels for TR6 / TR250 Triumph Classifieds 1
M TR6 TR6- Weber 3236 downdraft conversion Triumph 5
BierRunner TR6 TR6 Trunk Lock Striker Triumph 3
P TR6 Horn issue 1974 TR6 Triumph 5
C For Sale 69 Triumph TR6 Racecar Triumph Classifieds 0
R TR6 Crazy Ignition Failure in TR6 engine… Triumph 7
mctriumph For Sale 69 Tr6 Triumph Classifieds 1
B TR6 TR6 block decking Triumph 2
A TR6 How many fuel filters-TR6 Triumph 25
Got_All_4 General Tech TR6 Transmission Troubles Pops Out of 3rd gear Triumph 2
J TR6 Repadding TR6 frame Triumph 0
S Wanted Need an HVDA conversion kit for 73 TR6 Triumph Classifieds 5
M TR6 Sorting out new TR6 Triumph 10
tr6nitjulius For Sale TR6 Clutch Master Cylinder $40 Triumph Classifieds 0
S TR6 '72 TR6 distributor issues Triumph 3
R TR6 Limit Mechanical Advance on TR6 distributor? Triumph 8
RonC General TR TR3 Shifter on TR6 Triumph 8
B TR6 TR6 convertible top frame Triumph 0
K TR2/3/3A The TR6 gearbox Ist gear.... Triumph 1
tr6nitjulius For Sale TR6 tail light assemby & Resurfaced/New Ring Gear Flywheel Triumph Classifieds 0
tr6nitjulius TR6 TRIUMPH TR6 Triumph 7
S TR6 New tr6 purchase Triumph 31
Jim_Stevens TR6 Barn find of TR6 and many TR3 parts Triumph 9
nichola TR6 Hot spot on cylinder head - 1973 TR6 Triumph 2
R TR6 Heater control bezels TR6 Triumph 2
L For Sale 1974 Tr6 for sale Triumph Classifieds 0
tr6nitjulius TR6 TR6 Parts Visualization Triumph 0
Got_All_4 For Sale 1969 TR6 Driver Seat Triumph Classifieds 0
R TR6 TR6 Choke Cable Triumph 11
Got_All_4 For Sale TR6 TR250 TR4 parts for sale Triumph Classifieds 2
B For Sale TR6 Carburetors Triumph Classifieds 0
R TR6 TR6 Triumph 6
Chrisc9 TR6 TR6 brake light Triumph 6
glemon TR5/TR250 Answering My Own Question Rear Tube Shock Conversion Numbers TR4a-TR6 Triumph 0
tr6nitjulius General TR TRIUMPH TR6 the possibilities! Triumph 12
SherpaPilot TR6 Unidentified fitting on TR6 Engine Triumph 3
Got_All_4 TR6 Need 1969 TR6 Expert Got Questions Triumph 17
tr6nitjulius General TR 6/24/23 TRIUMPH TR6 (5) TR8 (2) Spitfire (1 RHD of 2) TR3A (1) Triumph 0
AngliaGT ANOTHER TR6,& an MGB Spotted 0
A For Sale 1974 TR6 Triumph Classifieds 1
Got_All_4 TR6 Triumph TR6 PDWA Brake Question Triumph 1
EWD For Sale ‘74 TR6 original wheel trim rings Triumph Classifieds 3
EWD For Sale ‘74 TR6 original radio Triumph Classifieds 0
EWD For Sale ‘74 TR6 original starter Triumph Classifieds 0
EWD For Sale ‘74 TR6 original steering wheel Triumph Classifieds 0
JPSmit TR6 at lunch today Spotted 0

Similar threads

Top