• Hey there Guest!
    If you enjoy BCF and find our forum a useful resource, if you appreciate not having ads pop up all over the place and you want to ensure we can stay online - Please consider supporting with an "optional" low-cost annual subscription.
    **Upgrade Now**
    (PS: Subscribers don't see this UGLY banner)
Tips
Tips

Carbon fouled spark plug

M

Member 10617

Guest
Guest
Offline
Yesteday I took my car into the shop for my "Spring Tune-Up." (Someday soon I'll know enough to do this myself.)

The mechanic installed new Champion spark plugs and adjusted the valves.

But as the mechanic had not applied anti-seize to the plugs, I decided to remove them today and apply the anti-seize myself. Here is what I found: plug #1 (from the front) was carbon fouled, but the other plugs were normal (according to my plug chart).

What could be causing plug #1 to carbon foul? -- bad plug? incorrectly set valves? some other reason? all of the above?

And is there something I can do to correct this without taking it back to the shop? Or should I just clean the plug from time to time and ignore the problem.

BTW: The engine was completely rebuilt 9 months ago and, of course, had a complete valve job done to it.
 

Twosheds

Darth Vader
Offline
How did the car run on the trip home?
 
OP
M

Member 10617

Guest
Guest
Offline
The car ran well on trip home (about 40 miles). The spark plug wires are new and I believe they were attached properly. But.... I also had the distributor cap replaced, so the mechanic had to reattach the spark plug wires to the new cap. They provided me with a NOS Lucas distributor cap which they said fit "a bit tight" but went on OK. Perhaps I need to check the connection of #1 spark plug wire to the distributor cap?
 
OP
M

Member 10617

Guest
Guest
Offline
I checked the distributor cap. The #1 wire was in it's socket (hole) and was tight, but I don't know if the little securing screw within the cap was tightened enough to penetrate the insulation of the #1 wire to make contact with the copper wire in #1. (I am assuming there has to be such contact.) So I removed the wire, replaced it in as far as it would go, and tightened the securing screw. I don't know if this has fixed it, but do you think it could have been the culprit?
 

TR3driver

Great Pumpkin - R.I.P
Offline
Not likely, IMO, but possible. You might want to try measuring the resistance from the terminal inside the cap to the spark plug clip (inside the boot) and comparing that to the other wires. (This is a good check to make anyway as part of a tune-up.)

Long experience has taught me not to dismiss things just because they are new or recently adjusted. I would first try swapping the plug with a different cylinder and take it for another nice drive. If the soot follows the plug, it has to be a bum plug no matter how new it is.

If #1 still soots up, check that the front choke is returning all the way, and that the mixture is set on the front carb. Then I'd run all the valves, since a tight valve can do strange things to mixture.
 
OP
M

Member 10617

Guest
Guest
Offline
Randall. I'm OK with your first two paragraphs, but I fall off the truck with the third. I know how to check the front choke, but the advice to "check... that the mixture is set on the front carb" is beyond me, as is "running all the valves." I'm in the dark on what these mean.

The thing that confused me a bit about the lead #1 in the distributor cap was that the end of the wire that plugs into the distributor cap had no part of the copper wire contained in its insulation sticking out of the insulation, although its end was visible. If the copper wire is not sticking out at all, how does it make contact? That's why I thought it might be that lead wire.

I had decided to put a new plug in #1 and take a ride tomorrow, so your advice confirms my intention. I'll see if it soots up again.
 

TR3driver

Great Pumpkin - R.I.P
Offline
Checking the carb mixture is a routine adjustment, covered in the owner's manual, which you can download here:
https://docs.google.com/viewer?a=v&p...yNzUw&hl=en

Basically, with the air cleaner(s) removed, engine warmed up and idling; lift the piston by 1/8" or so and listen to what the engine does. If it speeds up and then settles back to about the same rpm, the mixture is right. If it speeds up and stays up, the mixture is too rich. If it just drops, the mixture is too lean.

This should be a very sensitive test, even one flat on the mixture nut should make a noticeable difference. If not, there is likely to be something else wrong (like valve adjustment or ignition timing).

Valve adjustment is in the book too. Remove the valve cover, turn the engine until #1 is ready to fire (TDC with both valves closed) and slide a .010" feeler gauge between each of the rockers on #1 and it's associated valve. If you can push the feeler through with only a small amount of resistance, that valve is properly adjusted. If it's really hard, the adjustment is too tight, and no resistance indicates too loose. If you aren't sure if you are doing it right, try again with a .008" feeler (which should be too loose) and a .012" (which should be too tight).

Now turn it forward by 1/2 turn, and check #3. Another half turn, #4. Once more, check #2.

The "retaining" screw in the cap is supposed to pierce the insulation and make contact with the wire. Generally it works very well, but it's still worth checking occasionally, IMO. If it doesn't make good contact, the resulting spark can damage the wire conductor without showing any external damage. Checking the resistance will also show up problems with the resistors (if you have them).
 

MGTF1250Dave

Jedi Knight
Country flag
Offline
Aloha Ed,

The connection between the spark plug wire and the distributor cap is made by the screw in the center of the contact inside the cap. The end of the screw has a needle that pierces the plug wire insulation and contacts the cooper core of the plug wire. It is possible to miss or make a poor/intermittent connection. A ohm meter should let yon know if you have good continuity between the cap contact and the plug connector.
 
OP
M

Member 10617

Guest
Guest
Offline
I think the mechanic who installed the new distributor cap did not tighten the screw enough to pierce the plug wire's insulation. I reset the wire and tighten the screw and am certain that I pierced the insulation. It's 10 p.m. here now, so I will try the car out with a new spark plug tomorrow.

Randall. I didn't know what "running the valves" meant. Since it means adjusting the valves, then I'm good to go. The only problem is that they were adjusted yesterday and I watched every step very carefully and am certain that the guy got the gap right. But, of course, things could have changed a bit on my way home. If the new spark plug soots up tomorrow, then probably your two procedures need to be undertaken.

I don't think I would have any trouble "running the valves," but setting the mixture, I have been warned by many, is tricky and is best done by someone with experience. I can check to see if the mixture is off, but probably would have to ask a mechanic to do it for me. I don't even know where the "mixture nut" is located... And doesn't this involve undoing the coupling assembly and readjusting the carburetors, etc., etc. If so, I don't think I'm ready for that just yet.
 
OP
M

Member 10617

Guest
Guest
Offline
Here's an observation from a mechanic friend of mine who has been working on Triumphs for many years: "You could have shut it off as it was about to fire or before the exhaust stroke and that is why it looked different from the others. If the car is running OK, don't worry about it. If it is down on power and running rough, then it could be a bad plug or plug wire."

The fact is, the car is running very well.
 
OP
M

Member 10617

Guest
Guest
Offline
Richard. Ha, ha! You are right. I try to leave things alone unless I get some indication that there is a real problem, and then it pays to double check before "fixing" it. That's the beauty of this forum. I can check with the experts before deciding that I have to do something.
 

Twosheds

Darth Vader
Offline
Ed, why are you still on the 'puter at 10:30?

If the car is running fine, go for a ride in the country and thank your lucky stars that you are healthy enough to drive an old British sports car on back roads.

It's not the Space Shuttle. Don't worry so much.
 

PeterK

Yoda
Offline
I remember having firing problems on old VW's that turned out to be related to anti-sieze on the threads insulating the plug. VW's had aluminum heads and were famous for welding the plugs tight in the heads.

I think the solution (other than using NO anti-sieze) was to use copper formulated a-s. Clean out the threads in the head as well as the plug. All it takes is a very light even smear evenly around the threads. Too much a good thing.. uknow.
 

Twosheds

Darth Vader
Offline
PeterK said:
I remember having firing problems on old VW's that turned out to be related to anti-sieze on the threads insulating the plug. VW's had aluminum heads and were famous for welding the plugs tight in the heads.

I think the solution (other than using NO anti-sieze) was to use copper formulated a-s. Clean out the threads in the head as well as the plug. All it takes is a very light even smear evenly around the threads. Too much a good thing.. uknow.

You guys are probably tired of reading my posts about aircraft engines, but that's all I've got.

Aircraft cylinders are aluminum. Everyone puts anti-seize on the plug threads. When I was a young A&P and knew everything, I thought "If a little anti-seize is good, more is better, right?" One day I was globbing anti-seize on plug threads and the boss said, "A little dab'll do ya", a line from a hair cream ad popular at the time. I changed my ways.

Years later, a student of mine had a rucurring miss in his engine. He tried everything, including sending all the cylinders out for overhaul. Nothing worked. Then someone saw him globbing anti-seize on his plugs and pointed it out. Problem solved.
 
OP
M

Member 10617

Guest
Guest
Offline
Hello, Dr. John,

In fact, I went out to take a nice long drive and, guess what, it had started to rain. So, nice long drive canceled.

As for antiseize on the threads, I read in a number of spark plug sites that I should put antiseize on the threads, even with steel heads, because it assures easy removal of the spark plug and prevents corrosion and seizing. I've even had mechanics tell me this. So, I assumed it was the thing to do.

I've also been told (and here Dr. John can say if it is so), applying antiseize is mostly for dissimilar metals, steel plug into an aluminum head.

Knowing that I certaintly dont't want anything to enter the chamber, I apply only a very small amount, a very thin application, to the threads.

Since I change my spark plugs annually, I probably don't have to put any on the threads, and probably will stop the practice.

Waiting for the sun to shine.... and the beautiful, winding back roads to dry.... in Ole Virginie.
 

Attachments

  • 24486.jpg
    24486.jpg
    39.8 KB · Views: 242

TR3driver

Great Pumpkin - R.I.P
Offline
Too much is almost as bad as too little. But just a little copper-based anti-seize is a Good Thing, even with cast iron heads. Much better than having to repair those threads, IMO.
 
OP
M

Member 10617

Guest
Guest
Offline
Randall, so... "a little dab'll do me."

But you mention copper-based anti-seize. I am using Permatex anti-seize lubricant, which contains mineral oil, petroleum distillates, calcium oxide, aluminum, graphite, and silica. No copper mentioned.

The information on the tube claims: "Withstands High Temps, Prevents Seizing and Galling, Insures Removal of Spark Plugs, Prevents Corrosion." It also states: "Spark Plug Threads when installing in aluminum or cast iron heads."

Should I be using some other brand?
 

TR3driver

Great Pumpkin - R.I.P
Offline
I don't believe brand is so important, just which formulation you use. Permatex makes a copper-based version, which is probably fine.

51XZFEHZZ4L._SS500_.jpg


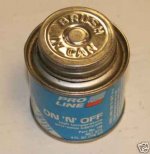
I've been using the same can of Fel-Pro for probably 20 years, but it appears they don't sell it any more.
 

Attachments

  • 24487.jpg
    24487.jpg
    12.2 KB · Views: 219
Similar threads
Thread starter Title Forum Replies Date
SherpaPilot TR6 Carbon Fouled Plug Triumph 9
K TR2/3/3A TR3...Carbon fouled plugs:Up-date Triumph 6
K TR2/3/3A Carbon buildup in an intake manifold and on spark plugs....... Triumph 3
D TR6 1971 TR6 carbon canister Triumph 1
EWD TR6 74 TR6 - Carbon canister rebuild Triumph 2
johnrip Wedge TR7 fuel in carbon canister-twin carb model Triumph 10
F Exhaust gas analyser - what carbon monoxide level should I expect from my BT7? Austin Healey 7
GTP1960 TR2/3/3A Rough running / a lot of carbon on the plugs Triumph 11
TulsaFred Throwout bearing: roller or carbon? Spridgets 9
C Carbon Deposits in Carburetor Austin Healey 3
sundown TR6 carbon canister Triumph 21
D Fuel leaking from carbon canister Triumph 6
S carbon /soot up the plugs Triumph 5
Rut Roller vs carbon throw out bearing Spridgets 17
RJS Carbon: Good vs. Bad Triumph 4
TR6oldtimer Carbon canister build Triumph 11
B Fuel Additive for Removing Carbon Austin Healey 2
I What is the best way to remove carbon? Triumph 23
7 Carbon canister plugged Other Cars 2
K TR2/3/3A "Cool running"...Hottter plug? TR3 carbon fouling. Triumph 11
Dadandson Carbon Rings; Remove or Not Remove Spridgets 2
R help with solenoid under carbon canister Triumph 3
B strage amount of carbon on the slide of one carb Austin Healey 7
CCURTISS T-Series MGTD/TF Carbon Release Bearing Question MG 3
E TR6 TR6 Carbon Canister Relocate? Triumph 24
T Carbon canister Triumph 2
E TR6 TR6 Carbon Can Triumph 15
G How to remove carbon buildup from piston tops..... Triumph 33
B Remove exhaust manifold carbon buildup Spridgets 2
John_Mc Carbon Canister woes Triumph 9
R Cleaning up carbon MG 5
lawguy Removing carbon Restoration & Tools 17
B Carbon Tip in Distributor Cap Austin Healey 6
Moose33 another newbie question- carbon canister MG 6
T charcoal / carbon canister Spridgets 2
7 Carbon Release throw out bearings MG 7
ObiRichKanobi Easy Carbon Canister check? Triumph 7
J TR2/3/3A steering fouled up Triumph 4
M Fouled Plug MG 14
trglory TR2/3/3A TR3a spark plugs Triumph 1
CARSINC Spark plug thread size Spridgets 2
K TR2/3/3A Heavily carboned spark plugs in relation to a failed FO8 gasket? Triumph 12
L T-Series Spark plugs again ? MG 2
B TR6 Gas on spark plugs Triumph 7
Carlbanan56 MGB No spark and engine cranking slow MG 10
kodpkd Spark Plugs Austin Healey 3
P TR2/3/3A NO spark at points Triumph 36
JohnGone MGB 1980 MGB Spark Plug recommendations MG 6
K TR2/3/3A Spark plug inspection Triumph 5
B Healey Won't Start - No Spark Austin Healey 38

Similar threads

Top